
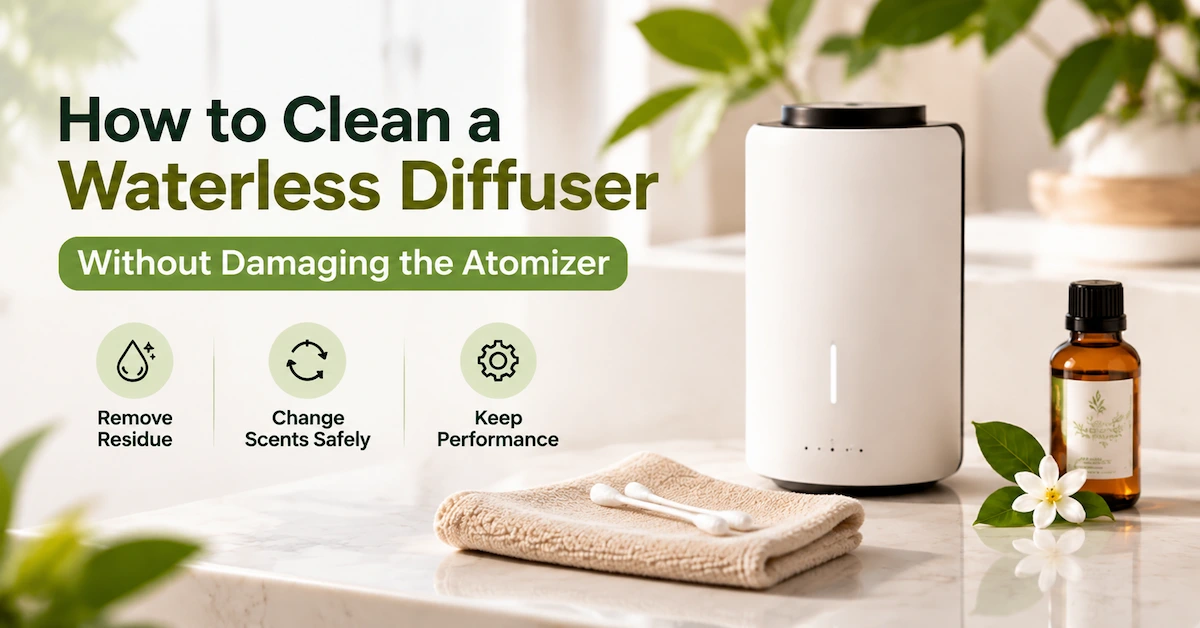
Quick answer: To clean a waterless diffuser, first stop the device and disconnect power, remove and cap the oil bottle, wipe accessible oil residue from the bottle neck, nozzle exterior and housing, then use only the cleaning fluid or purge routine approved for that exact model. Do not pour water into a cold-air atomizer, do not add alcohol or household cleaner by default, and do not open the housing unless the manufacturer provides a service procedure. For a scent change, the safest routine is to remove the old oil, clean the accessible interface, complete an approved dry or liquid purge if the model allows it, let parts dry, install the new compatible oil, and run a short test.
The search query how to clean a waterless diffuser usually appears after a practical problem: the fragrance has become weak, a new oil smells mixed with the previous one, the nozzle looks sticky, or the device has been stored with oil inside. A waterless diffuser does not have a water tank to rinse, so a familiar ultrasonic-diffuser cleaning routine can be the wrong routine. Cold-air and nebulizing designs move fragrance through a bottle, connector, nozzle and atomizer. Residue at any one of those points can affect output, but an unsuitable liquid can also damage seals, change oil viscosity or enter an electrical housing.
Ask CNUS for the Correct Cleaning Instructions
Why Cleaning a Waterless Diffuser Is Different
A waterless diffuser uses fragrance oil as the working liquid. Instead of diluting oil in a reservoir, the device uses air pressure, an atomizer or a nozzle to break the fragrance into a fine aerosol. That is why “waterless” does not mean “maintenance-free.” Oil can remain around the bottle thread, dip tube, connector, nozzle opening or atomizer path. A small amount of residue may be normal; a thick film, sticky connector or visible blockage is a maintenance signal.
Water is not a default cleaning solution
Water is appropriate only when the exact instructions say that a water-contact part can be rinsed and dried. Many waterless machines are designed around oil-only paths. Water can remain in a narrow passage, dilute the next fragrance, promote an unstable output or create a false impression that the atomizer is clean. The CNUS X2mini product page specifically warns users not to use water to dilute essential oil. That warning is about operation rather than a universal cleaning procedure, but it reinforces the practical limit: do not treat a waterless atomizer as a water diffuser.
Solvent choice is a model-level decision
Rubbing alcohol, ethanol, citrus cleaner, detergent and other household liquids are not interchangeable. A solvent that removes sticky residue from a metal surface may affect a plastic part, gasket, coating or printed finish. The X3Pro page lists aluminum alloy for the main body and atomizer, while the X3Art page lists composite PP for the main material. Those specifications do not, by themselves, authorize a solvent or prove that every internal part uses the same material. If the manual does not name a cleaning liquid, keep the external routine dry and ask the supplier before testing any fluid.
Cleaning is part of fragrance compatibility
Changing oil is not only a scent decision. Viscosity, carrier, botanical content, colour and evaporation behaviour can leave different residues. A dense woody formula may behave differently from a light citrus formula. A bottle that fits the connector may still be unsuitable for the atomizer. The waterless diffuser oil compatibility guide explains why a fragrance should be approved for the exact machine, bottle and nozzle rather than chosen only by scent name.
What You Need Before You Start
Most cleaning mistakes happen before the cloth touches the machine. Confirm the model, the oil currently installed, the next oil you plan to use, and whether the device is plug-in or battery powered. Keep the original bottle, cap, manual, order information and a phone camera nearby. A photo of the connector before removal helps when a bottle, gasket or nozzle has more than one orientation.
| Preparation | Why it matters | Low-risk action |
|---|---|---|
| Power | Oil and electrical parts should not be handled while the pump or fan is running. | Stop the device, disconnect the cable or switch off the battery model, and let it cool. |
| Oil bottle | An open bottle can leak into a desk, car console or machine housing. | Remove it upright, cap it immediately, and label the oil if it will be reused. |
| Work surface | Oil can mark wood, leather, painted plastic and soft furnishings. | Work on a stable, washable surface with an absorbent pad underneath. |
| Tools | Lint, metal picks and wet cotton can create a second blockage. | Use a lint-free cloth, dry cotton swabs, a soft brush and the approved cleaning material only. |
| Evidence | Support needs the model and symptoms to give a safe answer. | Record the model, oil, output setting, photos and any error or unusual noise. |
Do not start by removing screws. A consumer cleaning routine should not become an unauthorised repair. If oil has entered the housing, the device is hot, the battery is swollen, the cable is damaged, or the nozzle is stuck, stop and contact CNUS. The public CNUS return and repair policy provides an after-sales route for product problems and identifies the support email used to obtain repair-centre information.
How to Clean a Waterless Diffuser Step by Step
Step 1: Stop, unplug and cool the diffuser
Turn the diffuser off before removing the bottle. Disconnect the Type-C or DC cable and, for a rechargeable model, stop operation rather than cleaning while it is charging. Give the device enough time to cool if it has been running continuously. This matters for portable units used in a car, where a warm dashboard and a fragrance bottle can make a small leak spread quickly.
Step 2: Remove and cap the fragrance bottle
Hold the bottle or cartridge upright and remove it according to the model design. Do not pull a connector sideways or twist a magnetic nozzle against resistance. The X3Pro page describes a press-to-pop mechanism and magnetic adsorption for the nozzle and essential-oil bottle; use that feature gently rather than forcing the assembly. Cap the removed bottle immediately. If you are changing scents, mark the old bottle with the fragrance name and date so it is not mistaken for a clean bottle later.
Step 3: Inspect before wiping
Look at the bottle neck, threads, gasket, connector, nozzle opening and the area where the bottle meets the machine. Photograph any wetness, crystallised oil, cloudiness, dark residue or damaged seal. Inspection tells you whether a simple wipe is appropriate. A film on the outside is a different problem from oil inside the air path. If the connector is wet inside or the bottle has leaked into the housing, stop the cleaning routine and ask support for the model-specific procedure.
Step 4: Wipe accessible exterior residue
Use a clean lint-free cloth on the outside of the bottle, nozzle and housing. A dry cotton swab can reach the edge of a bottle neck or shallow groove. Use light pressure and change the swab as soon as it becomes wet. Keep liquid away from the charging port, buttons, display, battery openings and seams. Do not push lint into the nozzle hole and do not use a sharp needle to scrape residue from an atomizer. A sharp tool can enlarge an orifice or leave metal debris in the path.
Step 5: Clean a removable nozzle only as instructed
If the exact model manual identifies the nozzle as removable, remove only the part named in that procedure. Wipe the outside and the bottle-contact surface. If the manual permits a cleaning liquid, apply a small amount to the cloth or swab rather than pouring liquid into the opening. If the manual does not name a liquid, keep the nozzle dry and request confirmation. Put the part on a clean, lint-free surface until it is fully dry. Never reinstall a wet nozzle and then use a new fragrance as a test.
Step 6: Purge the atomizer only with an approved method
The atomizer is the point where an apparently clean diffuser can still carry the previous fragrance. Some manufacturers specify a short purge with an approved neutral fluid; others specify a dry run, a replacement nozzle or a service procedure. CNUS public product pages reviewed for this article do not publish a universal purge liquid or run time for all models. Do not invent one. Ask CNUS whether your model should be purged with an approved oil, a named cleaning fluid, a dry cycle, or a replacement part. If a liquid is approved, use the exact quantity and run time supplied for the model, then collect and dispose of the residue safely.
Step 7: Let accessible parts dry and reassemble
After wiping or an approved purge, allow the bottle connection and nozzle to dry. Do not use a heat gun, hair dryer or direct flame. Heat can change a plastic part, move oil deeper into a seal or create an unsafe condition around a battery. Reassemble the bottle, nozzle and cap in the same orientation recorded before removal. Make sure the bottle is seated without cross-threading and that the gasket is not twisted.
Step 8: Test with a short, controlled run
Place the diffuser on a protected, stable surface and run it for a short period at a conservative setting. Check for visible leakage, rattling, unusual heat, a sharp solvent odour or a fragrance that is still strongly mixed with the previous oil. Stop immediately if oil appears outside the intended path. A successful test means the device starts, produces the expected output, remains dry around the connector and sounds normal; it does not prove that an unapproved solvent is safe for long-term use.
Model-Specific Cleaning Notes for CNUS Diffusers
Model-specific notes prevent a common error: applying the cleaning routine for a large commercial machine to a portable consumer unit, or treating a plastic atomizer like a metal one. The notes below use public product-page evidence. They do not replace the exact manual, because none of the reviewed pages publishes a complete cleaning chemistry or disassembly sequence.
CNUS X3Pro: protect the magnetic bottle and aluminium-alloy atomizer
The X3Pro page lists a 10 ml capacity, 0.3 ml/h +/-5% oil consumption, an aluminium-alloy main material and an aluminium-alloy atomizer. It also describes a press-to-pop mechanism and magnetic adsorption for the nozzle and bottle. For routine care, focus on the bottle neck, magnetic contact area, nozzle exterior and charging port. Remove oil film with a dry lint-free cloth first. Do not assume that the metal atomizer allows any solvent, and do not flood the magnetic interface. Confirm whether the unit in your order is the plug-in Type-C version or the battery version before asking about a purge cycle.
CNUS X3Art: do not infer solvent compatibility from the composite-PP body
The X3Art page lists 10 ml capacity, DC 5 V input, below 32 dB noise, and composite PP as the main material. It does not show an oil-consumption figure or a cleaning method in the visible specification. For this model, dry exterior wiping and careful bottle removal are the defensible public steps. Ask CNUS whether the nozzle, internal atomizer, gasket and bottle interface use the same PP or another material before using alcohol or a liquid flush. A plastic outer body can be easy to wipe while the internal oil path remains sensitive to a solvent.
CNUS X2mini: keep water out of the oil path
The X2mini page lists a 130 ml capacity, 400 m³ coverage, 0.6 ml/h +/-5% oil consumption, composite PP housing and a PP atomizer. Its product note says not to use water to dilute the essential oil. That is an important operating boundary for cleaning decisions: do not rinse the oil path or fill it with water as a shortcut. Use the model instructions for any purge, and treat the PP atomizer as a component that requires material-specific confirmation rather than a generic household-cleaning target.
S600, S600 plus and AS3000S: use a documented service routine
Commercial units need a log, not an improvised wipe. The S600 plus page publishes multiple capacities and oil-consumption rates across the S600, S1500, S3000 and S6000 versions. The AS3000S page lists 1,000 ml capacity, 5,000 m³ coverage, 15 W power, 12 V input, a metal body, one-year warranty, and hotel, commercial and household applications. A commercial operator should record the exact model, oil batch, operating schedule, last cleaning, next cleaning trigger, nozzle or atomizer replacement and technician. Before disconnecting an oil line or opening a panel, obtain the service instructions from CNUS. A large reservoir can hold more residue, and a line that is clean at the bottle may still contain the previous formula downstream.
Review Compatible CNUS Fragrance Oil Options
Cleaning Before Changing Fragrance Oils
Most home users search for cleaning instructions when they want to change scent. The goal is not to make every molecule disappear; the goal is to reduce old oil in the accessible path and avoid turning a new fragrance into an unintended blend. Start by checking whether the new oil is approved for the machine. If the new formula has a different viscosity, carrier or colour, request a compatibility confirmation before filling the bottle.
- Finish or remove the old oil. Do not top up a nearly empty bottle with a new fragrance. Cap the old bottle and label it.
- Remove visible residue. Wipe the bottle neck, nozzle contact, connector edge and exterior with a clean, lint-free material.
- Use the model-approved purge. If the manual gives no purge method, contact CNUS rather than choosing alcohol or water.
- Allow the accessible interface to dry. A wet connector can dilute the new oil or create an output problem.
- Install the new bottle carefully. Confirm the gasket, thread, cap and bottle orientation before operating.
- Run a short test and record the result. Note the start-up sound, output, smell and any leakage before returning to the normal schedule.
How Often Should You Clean a Waterless Diffuser?
There is no single interval that applies to every waterless diffuser. A portable 10 ml unit used intermittently in a car has a different duty cycle from a 1,000 ml commercial machine running through a hotel schedule. Use trigger-based care and keep a record. The table below is an operating recommendation, not a replacement for the manufacturer interval.
| Trigger | What to inspect | Recommended response |
|---|---|---|
| Every bottle change | Bottle neck, gasket, connector edge, nozzle exterior and visible oil film. | Power down, remove the bottle, wipe accessible residue and confirm compatibility before installing the next oil. |
| After a leak or spill | Housing seams, charging port, buttons, battery area and surface underneath. | Stop use, disconnect power, document the condition and contact support if oil entered the housing. |
| Weak or uneven output | Oil level, bottle seating, nozzle opening, schedule, placement and residue. | Check the simple causes first; use an approved purge or request service instructions before disassembly. |
| New fragrance with strong carryover | Old scent in the bottle path or atomizer. | Follow the model-approved changeover procedure; do not mix oils or add an unapproved cleaner. |
| Commercial service window | Oil line, bottle, atomizer, output record, noise and mounting. | Follow the site SOP and CNUS service guidance; record technician, oil batch and parts replaced. |
| Long-term storage | Remaining oil, bottle cap, dry connector and exterior condition. | Remove and cap oil, clean accessible residue, store upright and follow the model storage instruction. |
Shorten the interval for long hours, heavier formulas, frequent scent changes, hot vehicles or repeated residue. Use a longer interval only when one compatible oil is stable and the machine remains dry; judge the connector, nozzle and output under the actual routine.
Symptoms That Cleaning May or May Not Solve
Weak fragrance after a bottle change
Check that the new oil is compatible, the bottle is seated, the device is in the intended mode and the nozzle is not blocked. Confirm that the room or car is not over-ventilated. If these checks pass, residue may be affecting the path, but the correct purge depends on the model. Do not assume a stronger scent means more power is needed; the issue can be a seal, bottle, atomizer or formula.
Oil around the bottle connection
Stop the device and identify whether the leak is from the bottle, cap, gasket, thread or connector. Wipe the exterior, keep oil away from electronics and do not continue running a unit that is wet inside. A replacement bottle or seal may be safer than repeated cleaning. For a defective or damaged unit, follow the CNUS after-sales and repair process rather than opening the housing.
New and old fragrance smell mixed
Carryover is likely when the previous fragrance was strong or the new formula is chemically different. Use the approved changeover method and allow a short transition test. If the smell remains after the manufacturer-approved purge, ask whether the nozzle or atomizer should be replaced. Do not use perfume, room spray or a reed diffuser refill as a cleaning liquid. Those products are not automatically compatible with a cold-air atomizer.
Unusual noise, heat or no output
Noise can come from a loose bottle, surface vibration, a damaged connector or a pump or fan problem. Heat, burning smell, a swollen battery or no output after oil entered the housing is a stop-use condition. Disconnect the device and contact CNUS with the model, purchase information, photos and a short video if safe to record. Cleaning is not a substitute for electrical or mechanical repair.
What Not to Do When Cleaning
- Do not pour water into the oil path. Water can remain in a narrow passage and change the next fragrance.
- Do not assume rubbing alcohol is safe. Solvent compatibility depends on the exact plastic, seal, coating and atomizer.
- Do not use detergent, bleach or household spray. Residue can be aerosolised or react with fragrance materials.
- Do not use a needle or metal pick. Scraping can damage the nozzle or leave debris inside.
- Do not mix old and new oils to “flush” the unit. The mixture can be incompatible and harder to diagnose.
- Do not run an empty machine for a long period. Follow the model instruction for any dry or purge cycle.
- Do not clean while charging. Disconnect the cable and protect the charging port from oil and liquid.
- Do not dismantle a commercial machine without service guidance. A line or pump may need a controlled procedure.
A Practical Maintenance SOP for B2B Operators
For a hotel, retail store, office, spa or scent-service team, cleaning should be a repeatable work instruction. Record what happened, which oil was used, what was cleaned and when the machine returned to service. A short log prevents every output problem being treated as a fragrance-strength problem.
Record the machine and oil as one system
Record the exact model or variant, bottle size, oil name, batch or lot, installation zone, output schedule, last changeover, cleaning action and operator. The same machine can behave differently with a new fragrance formula. A record makes it possible to tell whether a blockage follows the machine, the bottle or the oil.
Define safe operator actions and escalation points
Operators can normally stop power, remove and cap the bottle, wipe accessible residue, check the connector, photograph the condition and report the symptom. They should not choose a solvent, open a sealed housing, adjust an atomizer, disconnect a commercial oil line or override a leak response without an approved procedure. This boundary protects the product and makes warranty discussions clearer.
Approve the oil before the first deployment
CNUS publishes fragrance-oil product pages for different scent profiles and wholesale formats. Use the CNUS Wood Series essential oil page or the bulk-capacity essential oil page as starting points, then ask CNUS to confirm the exact machine, bottle, formula and cleaning procedure together. A fragrance page is not, by itself, proof that every oil is suitable for every atomizer.
Use a sample test before a larger rollout
For a B2B deployment, test one machine with the exact oil and schedule. Measure start-up, output, sound, visible residue, refill interval, leak behaviour, changeover carryover and the time required for cleaning. Keep the approved sample configuration. If the oil, bottle or machine changes later, repeat the relevant test rather than assuming the old cleaning method still applies.
When Cleaning Is Not the Right Fix
Cleaning is appropriate for accessible residue and a planned oil changeover. It is not the right fix for a cracked bottle, damaged cable, swollen battery, repeated leak, missing gasket, burnt odour, liquid inside the housing, a jammed mechanism or a pump that will not start. Continuing to run a damaged diffuser can spread oil into areas that are harder to service.
Contact CNUS with the model, order details, photos, oil name, operating time and a clear description of the symptom. The CNUS contact page is the appropriate route for technical questions, samples and model-level confirmation. If a product arrives defective, do not use it or throw it away; follow the current return and repair instructions and preserve the evidence requested by the support team.
Frequently Asked Questions
1. How do I clean a waterless diffuser?
Power it off and disconnect it, remove and cap the oil bottle, wipe accessible residue from the bottle neck, connector, nozzle exterior and housing, then follow the exact model instructions for any purge or cleaning fluid. Do not add water, alcohol or household cleaner unless the manufacturer approves it for that model.
2. Can I use water to clean a waterless diffuser?
Do not use water in the oil path by default. Water may remain in a narrow atomizer passage and affect the next fragrance. The CNUS X2mini page also warns not to use water to dilute essential oil. Ask CNUS whether any removable external part can be rinsed and how it must be dried.
3. Can I use rubbing alcohol to clean a waterless diffuser?
Not unless the exact model instructions approve it. Alcohol can interact with plastic, seals, coatings or residual fragrance. For public-page-only information, use a dry external wipe and request a model-level solvent recommendation before applying liquid inside a nozzle or atomizer.
4. How do I clean a diffuser before changing oils?
Remove the old oil, cap it, wipe the accessible bottle and connector surfaces, complete the manufacturer-approved purge if one is specified, let the accessible interface dry, install the compatible new oil and run a short test. Do not mix the old and new oils as a shortcut.
5. Why does my waterless diffuser still smell like the old oil?
Oil can remain in the bottle path, nozzle or atomizer, especially after a strong or heavy formula. Use the exact changeover procedure, then ask whether the model needs an approved purge or replacement nozzle. Increasing output does not remove residue and can increase oil consumption.
6. How often should I clean a waterless diffuser?
Inspect it at every bottle change and after any leak, strong carryover, weak output or long storage. Commercial machines should follow a documented service schedule based on the exact model, oil and duty cycle. CNUS public product pages reviewed for this article do not publish one universal interval.
7. Is the X3Pro easy to clean?
The X3Pro page shows a compact 10 ml design with a press-to-pop mechanism, magnetic nozzle-and-bottle positioning and an aluminium-alloy atomizer. Those features make accessible inspection practical, but they do not authorise a particular solvent or internal purge. Ask for the X3Pro cleaning instruction for the exact plug-in or battery variant.
8. How should I clean the X3Art?
Start with power-off handling, upright bottle removal and dry external wiping. The X3Art page lists a composite-PP main material but does not publish a visible cleaning chemistry or oil-consumption rate. Request confirmation before using alcohol, rinsing a component or opening the atomizer path.
9. Can I clean a PP atomizer the same way as an aluminium atomizer?
No assumption is safe. The material, seal, coating and internal geometry may differ even when two machines look similar. X3Pro and X2mini publish different atomizer material information. Use the exact model instruction instead of transferring a solvent or purge method from another diffuser.
10. What should I do if oil enters the housing?
Stop the device, disconnect power, do not shake it and do not keep testing it. Photograph the condition and contact CNUS with the model and purchase information. Liquid inside an electrical or battery area is a service issue, not a routine cleaning task.
11. Can I use reed diffuser liquid in a waterless machine?
Do not do so unless CNUS approves the exact formula for the exact machine. Reed diffuser liquid is formulated for passive evaporation and may have a different carrier, viscosity and residue profile from oil intended for a cold-air atomizer. The product format and bottle connection matter as much as the scent.
12. Where can I get the correct cleaning manual?
Use the CNUS contact page and provide the model, variant, oil and symptom. Ask specifically for the cleaning liquid, purge method, disassembly limit, drying time and service interval. Keep the answer with the machine or site SOP so future operators do not guess.
Conclusion
How to clean a waterless diffuser is not a question with one universal bottle of cleaner. The safe answer is a controlled sequence: stop and disconnect power, remove and cap the oil, inspect the connector, wipe accessible residue, use only a model-approved purge or cleaning fluid, let parts dry, reassemble without force and run a short test. Water, alcohol, detergent, needles and unauthorised disassembly can create a larger problem than the residue you were trying to remove.
For CNUS X3Pro, X3Art, X2mini and commercial S600 or AS3000S machines, the public product pages provide useful model evidence, but the final solvent and atomizer procedure should come from the exact manual or CNUS support team. Pair the right oil with the right bottle and machine, keep a changeover record, and escalate leaks, heat, electrical symptoms or internal contamination instead of continuing to experiment.
Review the CNUS X3Pro product page, CNUS X3Art product page or CNUS X2mini product page for the model you own, then contact CNUS for the approved cleaning and oil-compatibility instructions before a larger purchase or commercial rollout.